Memory Handbook: Adding Content & Designing Pages
Start from a blank canvas to add active belongings, photos, text, and decorative stickers, mastering canvas adjustments, backgrounds, and layout styling.
Page Overview
Start with an item, a photograph, or a single thought, letting each page tell its own story
“There is no rush to complete an entire volume at once. Capture a single moment today; layout and stories flourish naturally over time.”
💡 Navigation Guide: If you have not yet created a handbook, start with Memory Handbook: Create Your First Handbook. This guide walks through opening the editor, adding elements, arranging layouts, and saving pages.
✍️ Understanding Two Page Modes
Opening a handbook presents Reading View: pages turn quietly without distracting edit tools. To modify content, switch into the Page Editor.
Opening the Page Editor
Newly created handbooks open directly into the blank canvas editor. If you are currently in Reading View:
- Tap the handbook cover on your Memory Shelf;
- Tap the center of any page to display the reading toolbar;
- Tap “More” in the top right corner;
- Select “Edit Page”.
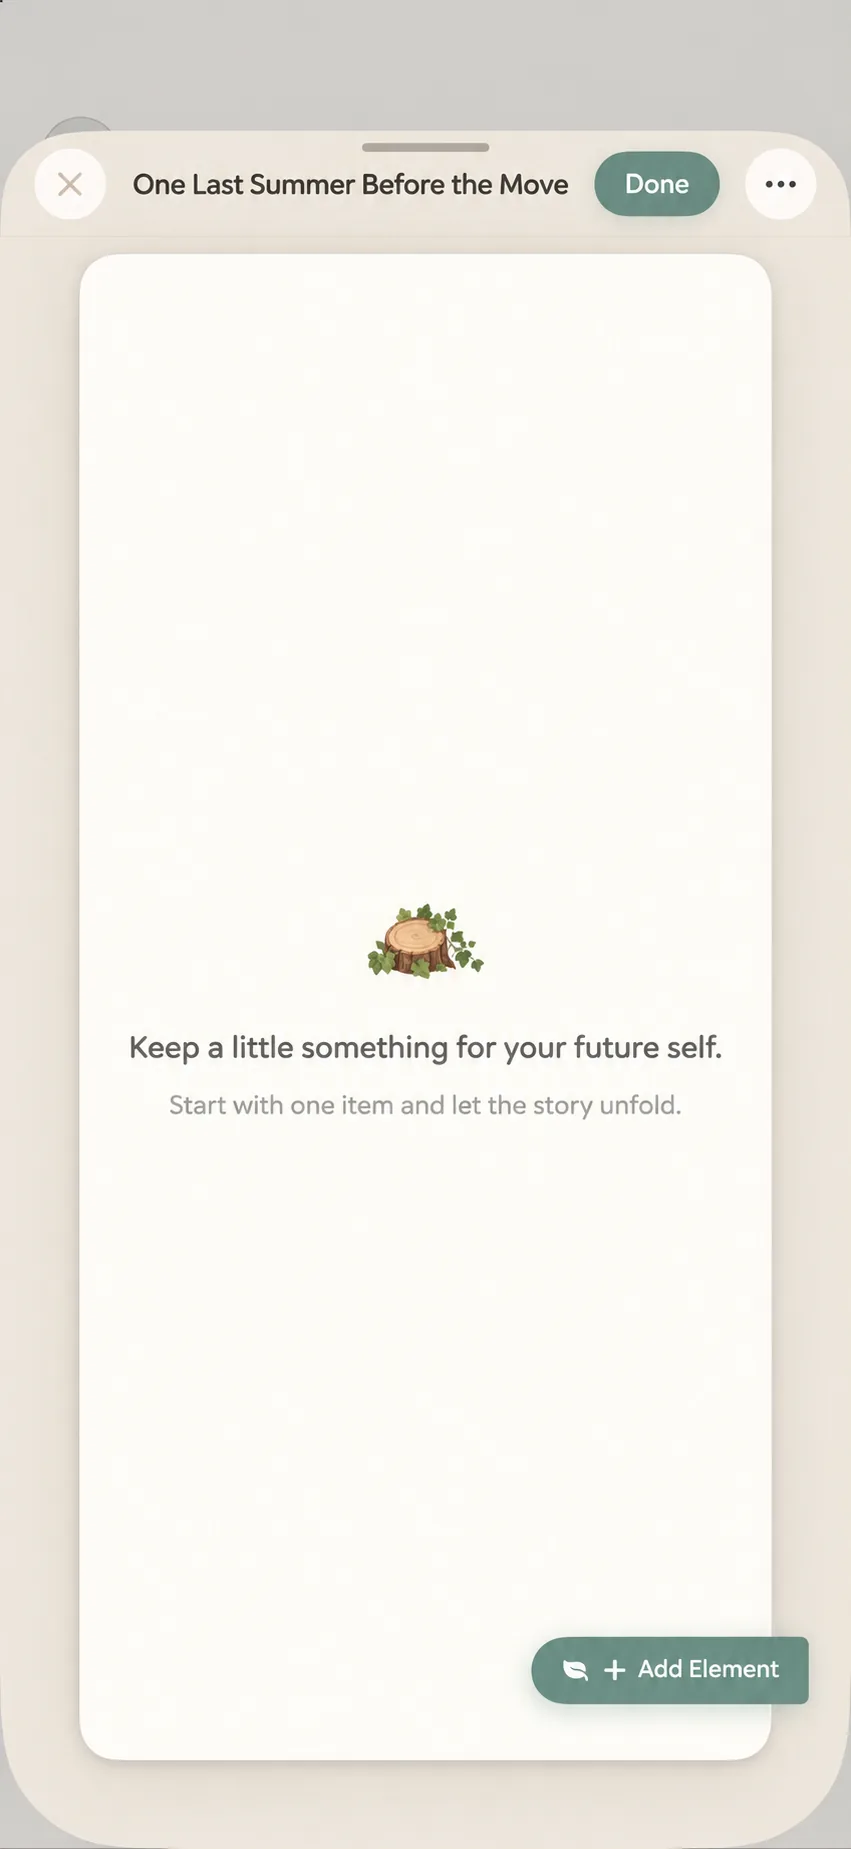
Adding Content with “Add Element”
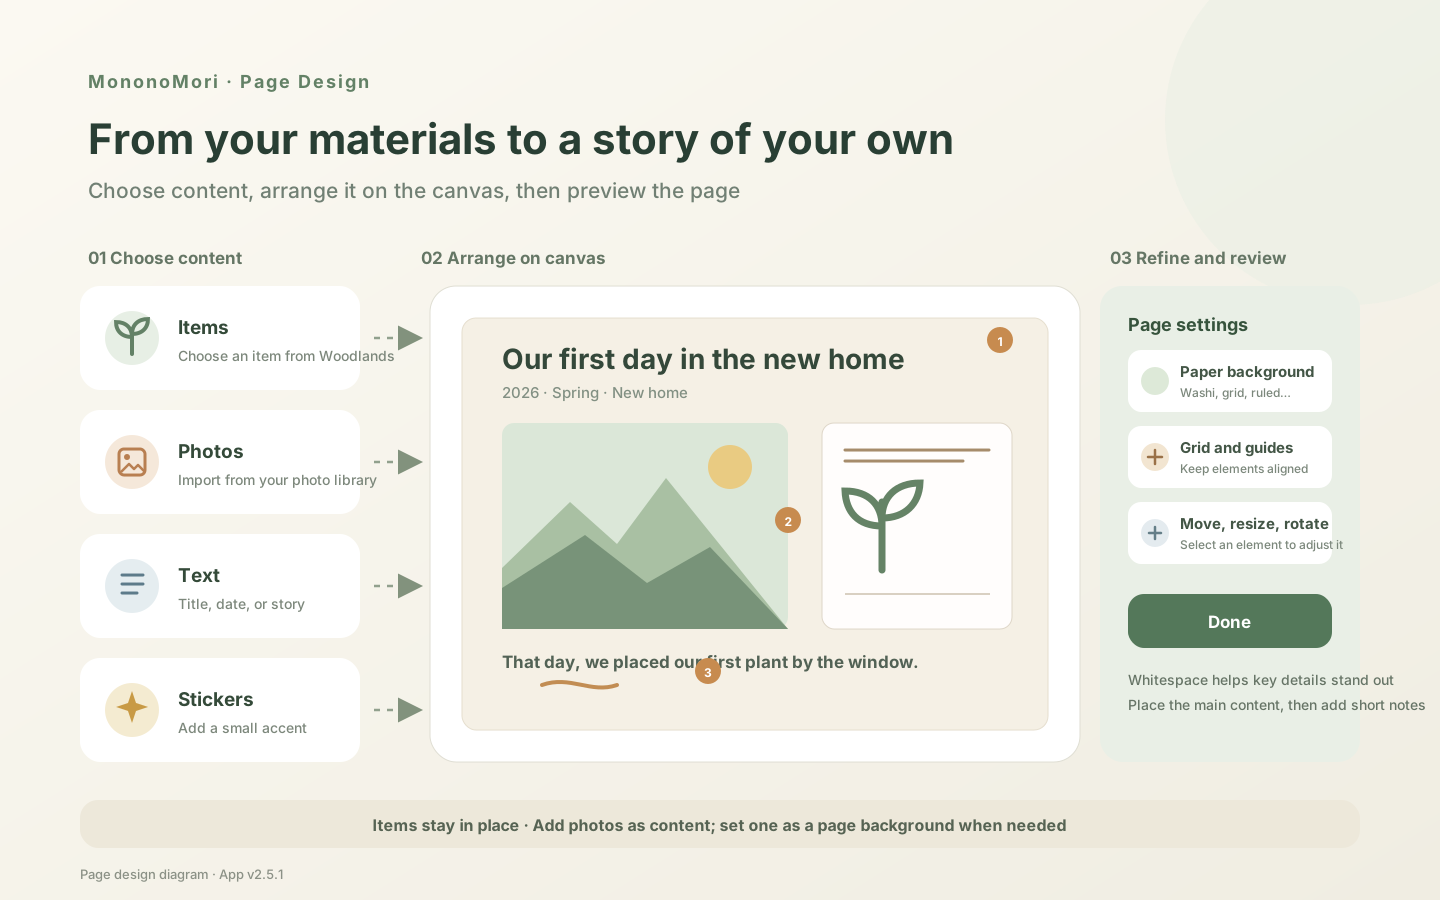
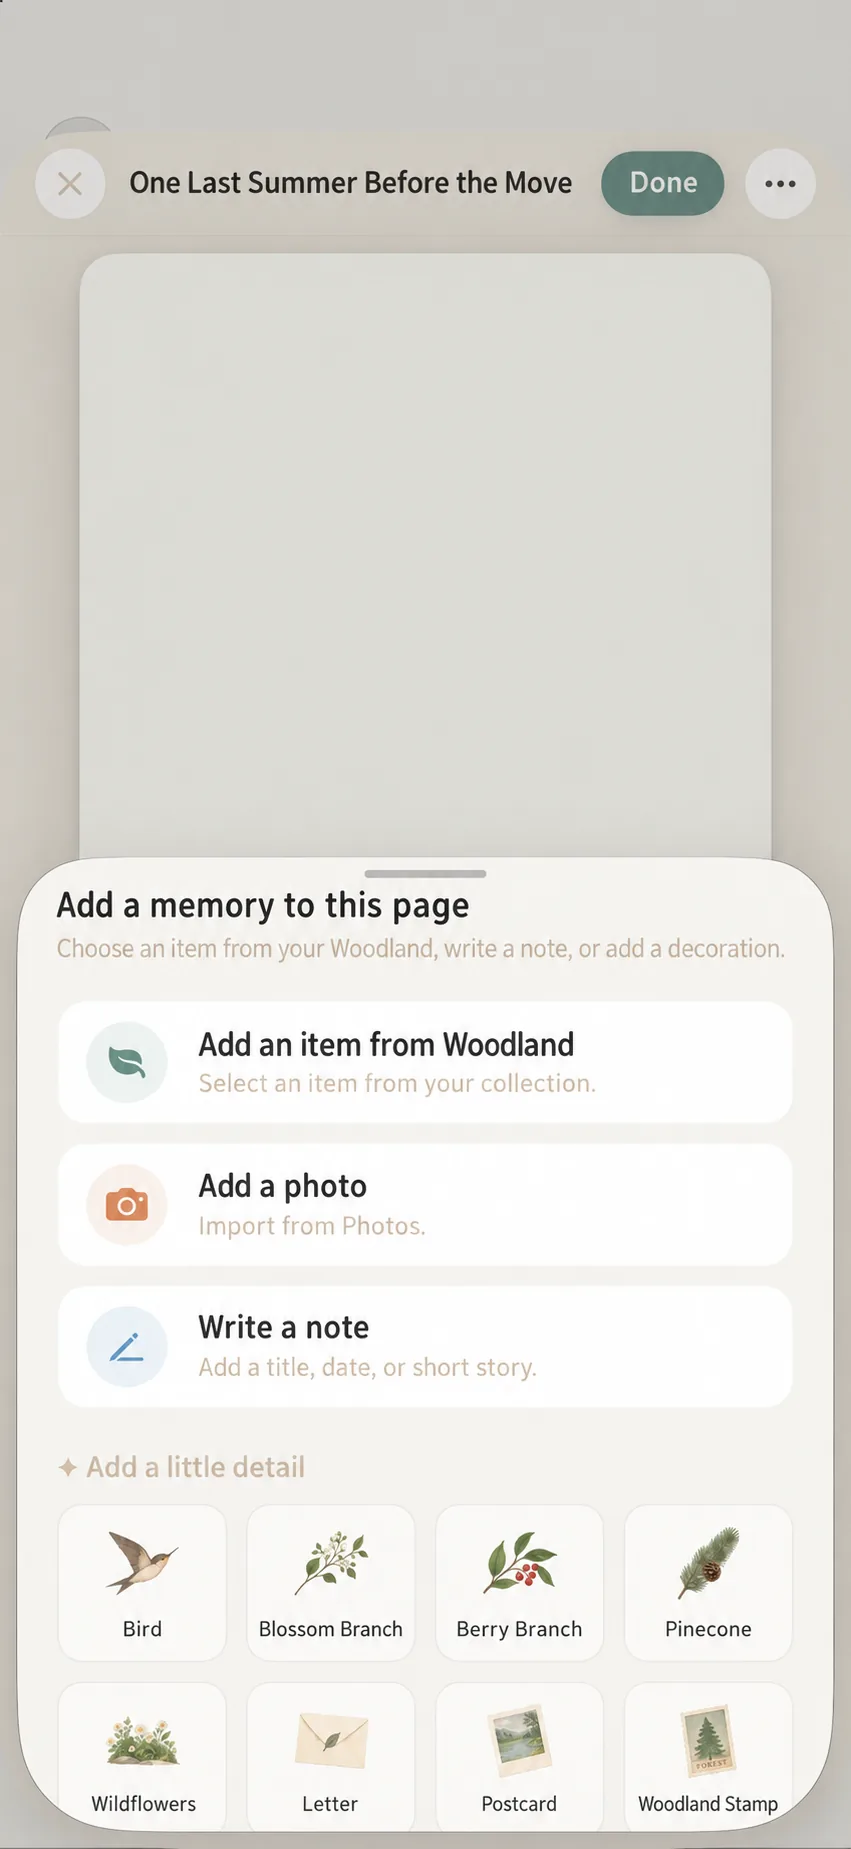
Inside the editor, the prominent green “Add Element” button on the canvas edge opens the materials palette. From here, you can pull active items from your woodlands, insert photos, write reflections, or place decorative stickers.
Select one element to start. Once placed, tap “Add Element” again whenever you wish to layer more content.
🍃 Adding Active Belongings
Selecting “Take an Item from Woodland” opens the item picker. Search by keyword or filter by category to select one or more items, then confirm.
The selected item appears as an illustrated element on your canvas. It remains safely in your woodland; placing it in a handbook never retires, deletes, or moves the physical record.
Can’t Find an Item in the Picker?
The picker displays active items currently residing in your woodlands. Items already moved to Memory Forest, deleted to the Recycle Bin, or not yet created will not appear here:
- To include an item currently in use, add it to your woodland first;
- To remember a departed item, insert its photo and write its story;
- If you don’t have item records handy, begin with “Add Photo” or “Write Reflections”.
Extracting Item Details
Selecting an item element on the canvas reveals “Item Info”. Tap here to review details, extract notes directly onto the canvas, or pull existing photo attachments.
🖼️ Adding Photos
Tap “Add Photo” to open your iOS photo library. Selected photos appear as movable elements that can be repositioned, resized, or rotated.
To use a photo as a full-bleed page background:
- Import the photo via “Add Element” > “Add Photo”;
- Open “More” > “Background” from the top-right toolbar;
- Choose the imported photo as the page backdrop.
📝 Writing Text: Headlines & Reflections
Selecting “Write Reflections” opens an expressive typography editor for titles, dates, descriptions, or personal essays. Choose from preset styles or fine-tune font, size, weight, color, alignment, line height, and text frame width.
A clean, legible page typically features:
- A Headline: Introduces what the page is about;
- Date or Location: Grounds your future memory;
- Photo or Item Element: Serves as the visual focal point;
- A Short Story or Note: Captures personal reflections and little details.
🌿 Decorative Stickers
Choose from botanical, nature-inspired, and journal-themed stickers in the palette. Stickers add polish to dates, accentuate headlines, and balance white space.
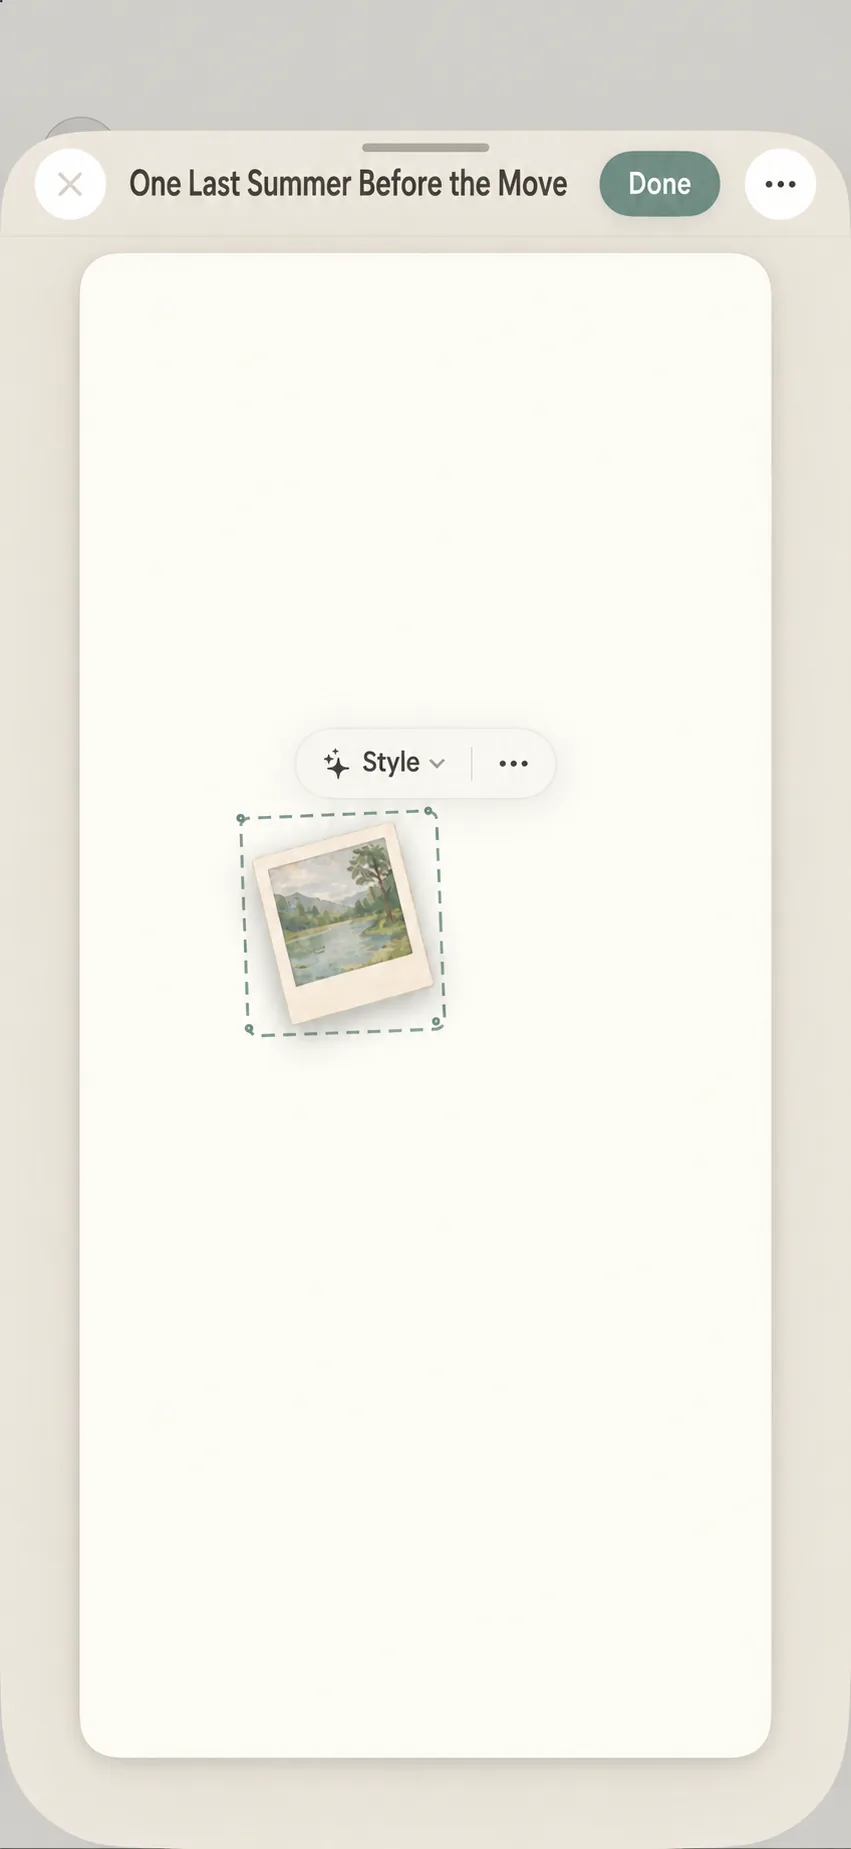
When multiple elements overlap, use the contextual action bar to duplicate, bring forward, send backward, or delete. Use Undo or Redo in the “More” menu if you make a mistake.
🎨 Page Dimensions, Paper Textures & Grids
The “More” menu in the editor offers canvas controls:
- Dimensions: Switch between Full Screen, Portrait 4:5, Square, and A5 Paper;
- Paper Textures: Choose from Washi Paper, Natural Paper, Vintage Kraft, Deep Forest, or Midnight Moon, paired with Blank, 5mm Dot Grid, Square Grid, or Ruled lines;
- Alignment Aids: Toggle grid display, snap-to-grid, and alignment guidelines.
💾 Saving & Best Practices
The app automatically saves edits during your session. Tapping “Done” in the top right corner saves and exits to Reading View. When handling high-resolution photos, allow them a moment to finish processing before exiting.
❓ Frequently Asked Questions
Q1: Why aren’t departed items listed in the item picker?
The picker displays active items in your woodlands. To honor departed belongings, insert their photos and write their stories directly.
Q2: Why didn’t my photo fill the whole page?
Photos default to movable elements. To make a photo the full background, open “More” > “Background” and assign it as backdrop.
Q3: What should I do if text overflows the bottom of the page?
Reduce font size, widen the text container, or divide long stories across consecutive pages.
🌲 Next Step
Once your page looks great, tap “Done” to read it. Continue to: Memory Handbook: Reading & Organizing Your Shelf.