

Farewells & Memories
Updated for v4.0.0Memory Books: Start One and Arrange It on the Desk
Lift the corner in the Memory Forest to reach the desk, start a new Memory Book, then use the pencil case to put items, photos, tags, words, tape and drawings on a page, and adjust stickers, paper and canvas.
Updated on Nov 3, 2026 ~20 min read
On this page
A Memory Book is a book you put together yourself: a trip, the year you moved into a new home, the old things your grandmother left you. You pick items, photos and tags from the Memory Forest, stick them on the page, and write a few words. Nothing is generated for you; you lay out every page.
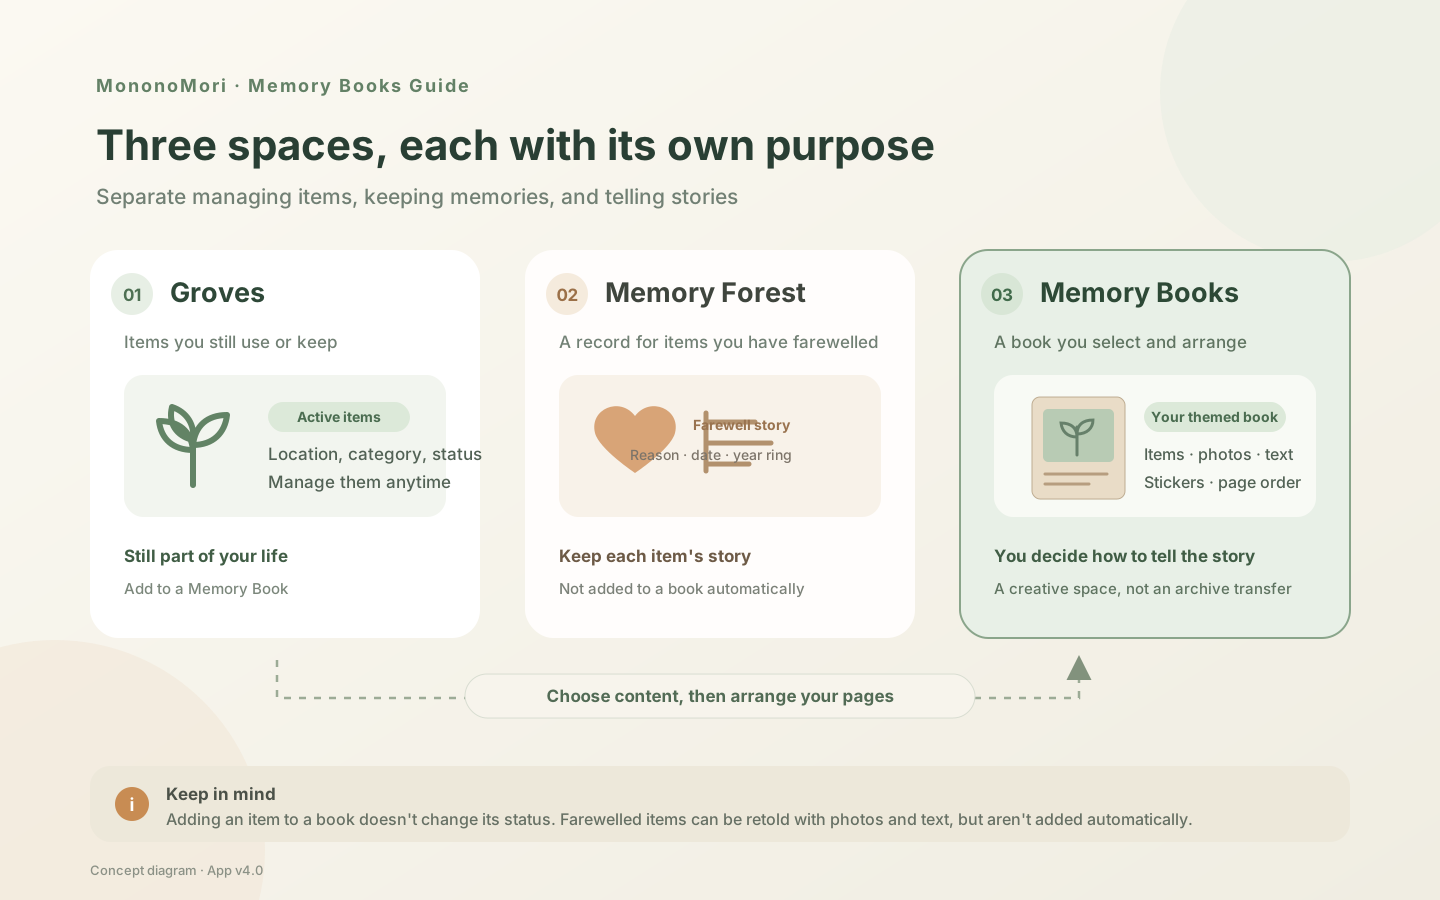
How Memory Books differ from groves and the Memory Forest
| Where | What it holds |
|---|---|
| Groves | Items that are still part of your life |
| Memory Forest | Tags left after farewells, one per item, recording how it left and its rings |
| Memory Books | Themed books where you choose the material and lay it out freely |
Putting an item in a Memory Book only adds a sticker of it. The item is not moved, said farewell to or changed in any way.
Find the desk
- Tap Memories at the bottom.
- At the bottom right of the top area is a small lifted corner labeled Books. Tap it, or drag it up and to the left, and the desk is underneath.
Swipe it down and to the right to fold the corner back, leaving just a small dog-ear. Tap the dog-ear to open it again. You can also tap the bookmark ribbon on the bottom edge of the forest card in More and find Memory Books in Explore the Forest.
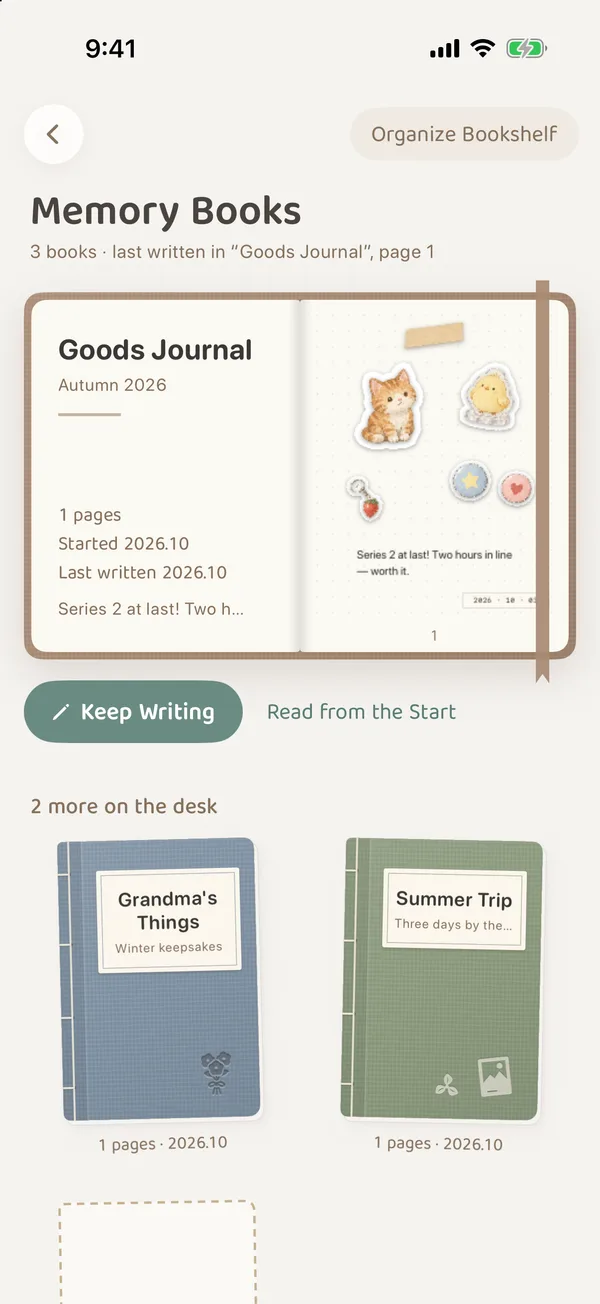
On the desk:
- The title, Memory Books, with how many books you have and which page of which book you wrote last.
- The book you are working on lies open at the top: the left page has its title, page count, and the months you started and last wrote; the right page is the page you wrote most recently. Below are Keep Writing and Read from the Start.
- Your other books lie on the desk, with how many more there are, and each shows its page count and the month you last wrote in it.
- A dashed book at the end: tap it to start a new book.
Start a new book
-
Tap the dashed book on the desk to open New Notebook. The cover preview at the top changes as you choose.
-
Write a Name, such as “Winter Trip to Hokkaido”. Description / Epigraph is optional.
-
Choose a page size:
Size Good for Full-screen Page Mostly reading on your phone Portrait 4:5 Photos with words Square One set of pictures and a short note per page A5 Paper The proportions of a paper journal -
Bind the cover: choose a Cloth (Pale Sage, Cloud Mist, Slate Blue, Linen Tea), up to three Marks (or Plain), a Layout for the marks (Corner Seal, Crest, All Over, Scattered) and a Stamping (White Ink, Gold Foil, Blind).
-
Tap Create. The new book lies open at the top of the desk with one blank page. Tap Keep Writing to start your first page.
Start writing a page
While you read, the buttons on screen are tucked away so you can look in peace. To put things on a page, start writing first:
- On the desk, tap Keep Writing to go straight to the most recent page;
- While reading, tap the middle of the page, then the green Write This Page at the top;
- While reading, tap ··· and choose Edit Page.
A book with nothing in it yet opens straight into writing its first page.
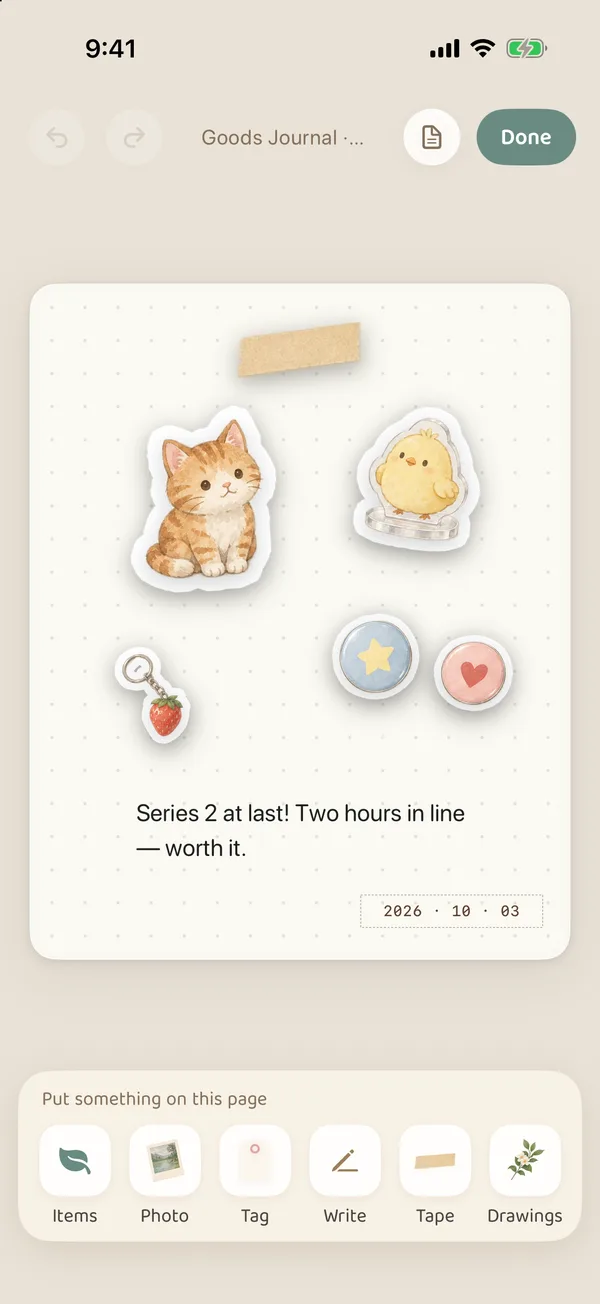
The pencil case: put something on this page
While you write, the pencil case sits below the page, titled “Put something on this page”:
| Tool | What it puts on the page |
|---|---|
| Items | Opens Add to Notebook, where you pick items from your groves and the Memory Forest. You can search, filter by category and pick several at once. Each one becomes a cut-out sticker |
| Photo | Pick a photo from your photo library |
| Tag | Opens A Tag from the Memory Forest, to stick on a tag from a farewell |
| Write | Write some text on the page |
| Tape | Stick on a strip of washi tape |
| Drawings | A set of small hand-drawn stickers, such as a flowering branch, a pinecone, an envelope, a sleeping cat or coffee |
Hibernating items and items in the Recycle Bin do not appear in Add to Notebook.
Adjust stickers
Tap a sticker on the page to select it, then drag, pinch and rotate it with your fingers. The pencil case changes to “How this sticker looks”:
- Plain, Edge, Dashed, Torn, Tape, Shadow: change its border;
- Edge colour, and More Colours and Widths;
- Item Details (item stickers only): add its name, category and notes to this page, or put the photos from its Treasure Box on the page too.
For a selected sticker you can also choose Duplicate, Bring to Front, Send to Back, Lock, Move to Other Page… or Delete. Once locked, unlock it before you can adjust it again.
Write
Tap Write to write right on the page. Select the text to change its words, font, size and color, and drag its edge to change the width. Long lines wrap on their own. Each block holds up to 20,000 characters.
To use your own fonts, import .ttf or .otf font files, up to 50. This works on the free plan too.
Paper, canvas and grid
While you write, the paper button next to Done at the top right adjusts this page:
- Background: a paper color (Washi, Paper, Vintage Kraft, Forest, Midnight), a paper texture (Blank, Dots, Grid, Lined), or Use Last Photo to fill the whole page with the most recent photo you added.
- Canvas Size: switch between Full-screen Page, Portrait 4:5, Square and A5 Paper. Afterward, check that your text and pictures are still inside the canvas.
- Grid: Show Grid, Snap to Grid and Show Guides help you line things up. They only show while you write.
- Duplicate Page, Delete Page: deleting a page cannot be undone.
Saving
Changes save automatically while you write. Tap Done at the top right to save once more and go back to reading. Undo and redo at the top left fix mistakes, but they cannot bring back a whole page you deleted.
If you see “Couldn’t Save This Page”, the page stays open. Do not close it yet; tap Done again.
Free plan and Forest Guardians
| Free | Plus | Premium | |
|---|---|---|---|
| Books | 1 | Up to 3 | Unlimited |
| Pages per book | Up to 5 | Unlimited | Unlimited |
| Export | PNG with a faint watermark | PNG without watermark, PDF | PNG without watermark, PDF |
When you have used up your books, tapping the dashed book shows the plans first. If your plan changes, your existing books are not deleted, and you can still read, edit and reorder them. You just cannot make new books beyond your allowance, and on the free plan you cannot add pages to a book that already has 5. For export limits, see Memory Books: Reading, the Bookshelf and Export.
Common questions
Can I start a Memory Book before I have any items?
Yes. Photos, words, tape and drawings need no items. To add an item, plant it in a grove first.
Can I add old things I have already said farewell to?
Yes. Items lists items from both your groves and the Memory Forest, and you can also use Tag to stick on the tag from the farewell.
Why doesn’t my photo fill the whole page?
A photo is a movable sticker by default. To use it as the background, tap the paper button and choose Use Last Photo under Background.
Where did Add a Touch go?
From 4.0, everything you add is in the pencil case below the page: Items, Photo, Tag, Write, Tape and Drawings.